
Power BI provides a range of useful connectors for services, such as Google Analytics and Mail Chimp. Which make it simple to connect these services together. Although it is possible to connect it to other services as seen in the video below:
However sadly, there is no out of the box way to connect Power BI and Application Insights. There are some steps required:
First we must enable Continuous export. This feature allows Application Insights to continually outputs data to a container. Note: you must using the paid tier of Application Insights, to use this feature.Once exported from Application Insights to a previously configured storage container, we will use Azure Stream Analytics, to digest and export the data to Power BI.
Step 1 - Create storage in Azure
In the Azure portal, choose New, Data + Storage, Storage account
Step 2 - Create a container
- In the newly created storage account, click Containers and then Add
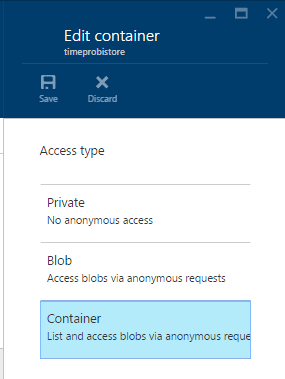
- Edit this container access type and set it to Container as seen in the image below
Step 3 - Start continuous export to Azure storage
- Browse to the Application Insights instance for your application.
- Choose Continuous Export, Click ‘Upgrade your pricing tier now’ and move to a paid tier.
- Select the storage account (created in step 1)
- Set the export destination (created in step 2)
- Set the event types you want to export.
Step 4 - Inspect the exported data.
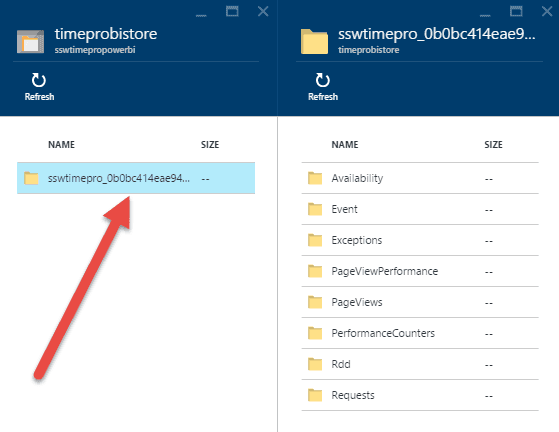
Very important to make a note of the path name, as seen in the image below.
Step 5 - Create an Azure Stream Analytics instance
From the Classic Azure Portal, choose New, select Data Services and complete the Quick Create to create a new Stream Analytics job.
Step 6 - Set blob location
Set the new Stream Analytics job to take input from your storage contair, which holds the blob from Continuous Export.
Step 7 - Set the Date Format
Set the Date Format to YYYY-MM-DD (Please note: you must select with dashes).
Step 8 - Set path prefix pattern
The Path Prefix Pattern defines where Stream Analytics can locate the input files within the storage container. For Example
blogchrisbriggsy_67af5f56a1cd4d9ebf905e3aebaa9a77/PageViews/{date}/{time}
- blogchrisbriggsy_67af5f56a1cd4d9ebf905e3aebaa9a77 is the path name from Step 4
- PageViews specifies the type of data to analyze.
Lastly set the serialization format to JSON
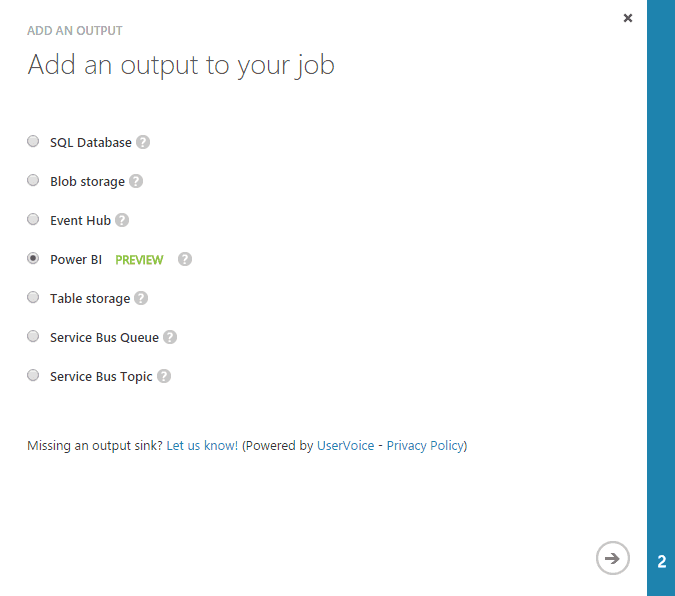
Step 9 - Configure the output
- Select the new channel, click Outputs, Add, Select Power BI
- Authorize Stream Analytics to access your Power BI resource
- Create a name for the output
- Create a name for the Power BI dataset
- Create a name for the Power BI table
Step 10 - Set the query
The query directs the translation from input to output.
Select the job and click Query. Paste the sample query below.
Due to the data being in the format of nested JSON array, we have to use GetElements to fetch, our event JSON object. The Select picks the event name and count of the number of instances.
When working with Azure Stream Analytics And Power BI it is important to use a GROUP BY clause. Therefore we have applied a TumblingWindow to this data which groups all of events by 1 minute time periods.
Step 11 - Run the job
From personal experecnce I find its best to wait ten minutes, to make sure the stream analytics doesn’t enter into a degraded state. In case of this happening, a pop-up will inform you of the cause of the error. Otherwise login to Power BI.
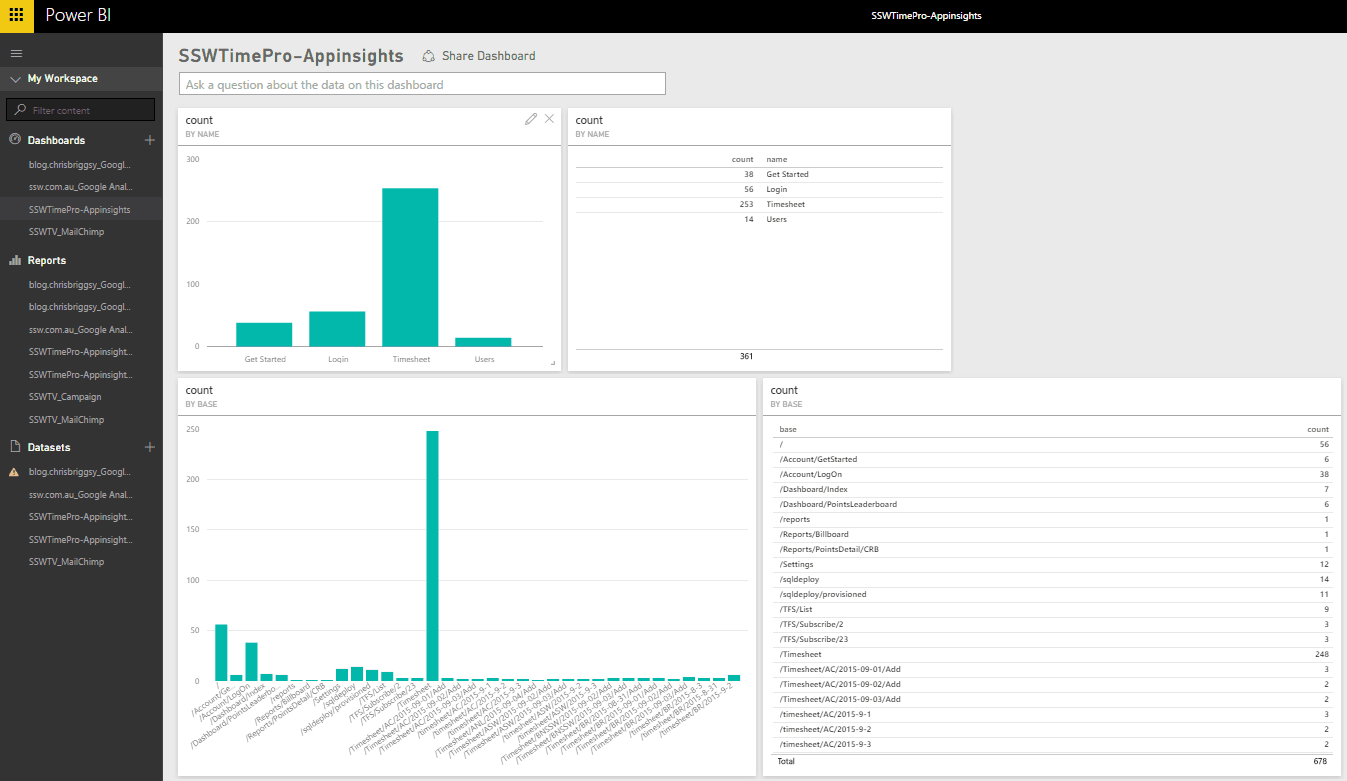
Step 12 -Power BI
Open Power BI you will find your dataset exported from Application Insights are ready to be used in Power BI reports and dashboards in Power BI.
Step 13 - The Next step
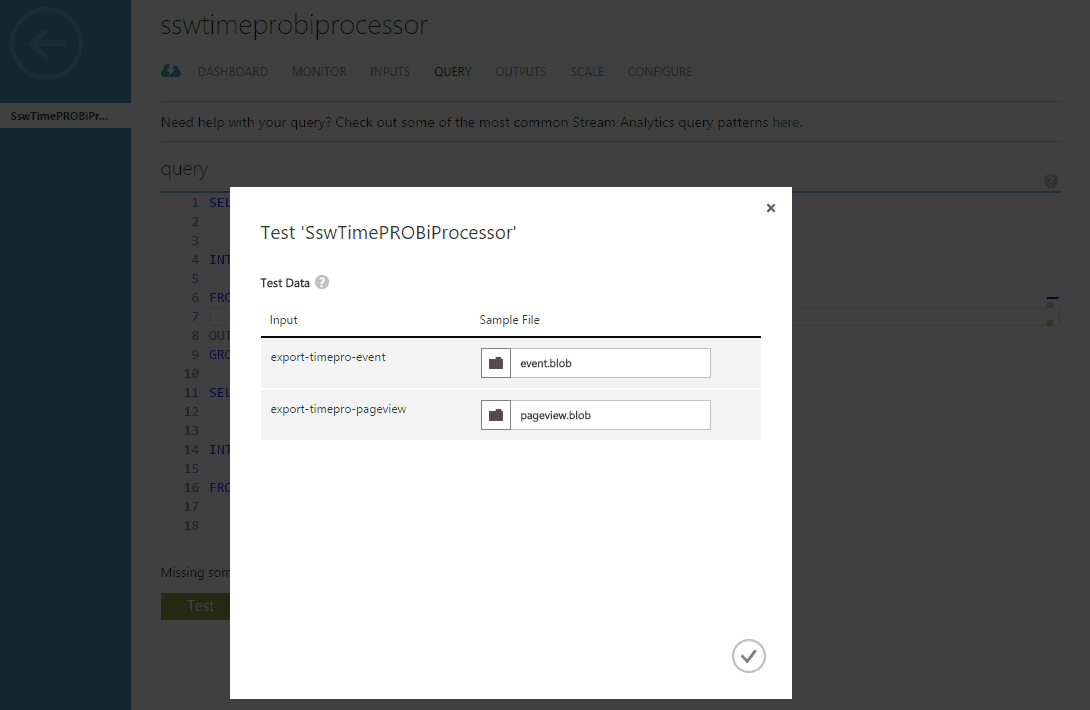
You’ll need to refine further your query. The technique I found that works is to download a few of the blobs from the storage container and then use the built-in testing tools on your Azure Stream Analytic page.
PLEASE NOTE: The following at the time of writing this blog post, the flow for the Azure Stream Analytics and the beta Power BI connector is:
- Each input can only access one data type
- Each input must output to a separate output
- Each output must not share a dataset, if they are writing to a different data table.
- When Creating an output that can communicate with Power BI, you must authenticate it
Therefore, if you’re importing all of the information out of application insights you need to configure nine inputs, outputs, datasets which furthermore means signing once for each output.
Feel free to tweet me comments, feedback or questions to @ChrisBriggsy.