
What is Dependency Injection?
Why do I need it with Windows Universal
By making use of Dependency Injection, you gain the following benefits:
- More Testable Code
- More Reusable Code
- More Readable Code
Furthermore, there are is an additional benefit: To make use of the unique capabilities of the device you are deploying to you must add an Extension SDK Eg Windows IoT Extension SDK. The Extension SDK makes your application belong to a Device Family. Therefore you may receive a ‘file not found’ exception when your app calls the SDK while running on a device of a different family. Therefore by using Dependency Injection we can substitute this dependency with one that won’t cause our code to fall over.
Dependency Injection allows us to bend the restrictions imposed on developers by the Device Family paradigm within Universal Windows Platform!
Refactoring a Windows IoT to use Dependency Injection
The application I built for my ‘Dev Superpowers Jumping into Windows Internet of Things development by using the Universal Windows Platform’ was only able to run on Windows IoT.
Therefore In this example, We will refactor it to be able to run on Windows 10 & Windows IoT devices.
Step 1 - Get the source code.
Step 2 - Extrat interface
I make use of ReSharper, which has inbuilt tools for making the extracting of interfaces simple.
- Open ‘SparkFunWeatherSheild.cs’
- Hover mouse pointer over the Setup method
- click Extract Interface on the Extract submenu from the Refactor menu.
- Select Place in another file then Clicks All Public
- Click Next and you have extracted your inference
Step 3 - Create a desktop compatible version
- Create a new class named DesktopWeather
- Make it inherit from ISparkFunWeatherSheild
- Hover over red underlined interface name and click Implement Interface
- Now we implement the Setup() method to get data and store it in the respective properties
- Lastly, we implement Humidity & Temperature to return the value within their respective properties
Step 4 - Add autoFac
Run the following command in the Package Manager Console:
Install-Package Autofac -Version 3.5.2
Step 5 - Create addtional configurations
- Build -> Configuration manager -> Active solution configuration -> New…
- Create a new configuration “Pi”.
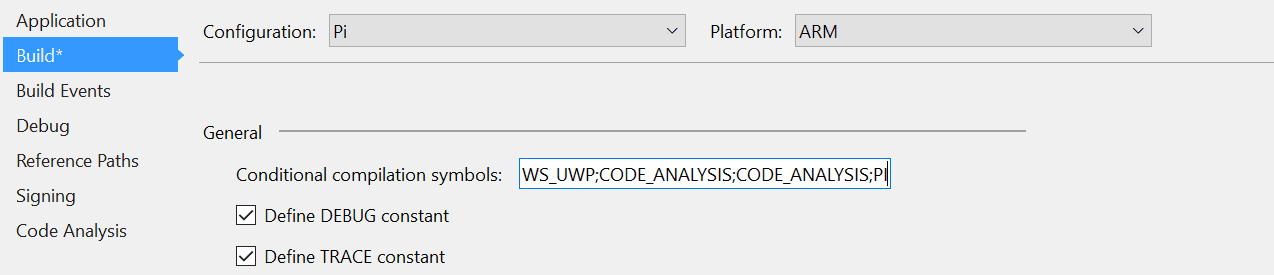
- Project -> Properties -> Build -> Configuration -> Pi
- Conditional compilation symbols: type ;PI
- Save project and rebuild
Step 6 - Wiring it all up
Create a new ContainerBuilder and use the C# compiler directive, to map a different class to the interface depending on the currently selected Active solution configuration.Then we will refactor code to fit within the container lifetime scope, this allows AutoFac to dispose effectively of our objects after use, improving performance. As seen below:
Feel free to tweet me comments, feedback or questions to @ChrisBriggsy.